
Tote bag sewn with quilted fabric. http://www.lifeatthecottage.com
I love the two-sided quilted fabrics especially when the opposite side is a coordinating fabric. I made this tote bag to carry books and magazines, I pad, or anything I need to keep handy when traveling. I like the stiffness the quilted fabric gives the bag. I didn’t have a pattern but here are the instructions:
About 1 1/2 yards of double-sided quilted fabric (this depends on if you make your own straps)
Button for pocket
Matching thread
- Cut 2 20×20 inch pieces of fabric for the body of the bag
- Cut pocket 7 inches wide x 6 inches long
- Cut flap 7 inches wide by 5 inches long. Trim side at an angle so the side measurement is 3 inches creating a point for flap
- Cut fabric for 100 inches of strap or purchase strap (I made my straps 1 1/2 inches finished width.
Determine which side of your fabric is the outside and turn 1/2 inch on one side to the right side and iron. This will be the top of the bag. Now turn 2 3/4 to the right side and iron. Top-stitch the turned under edge. Do the same to the other piece.
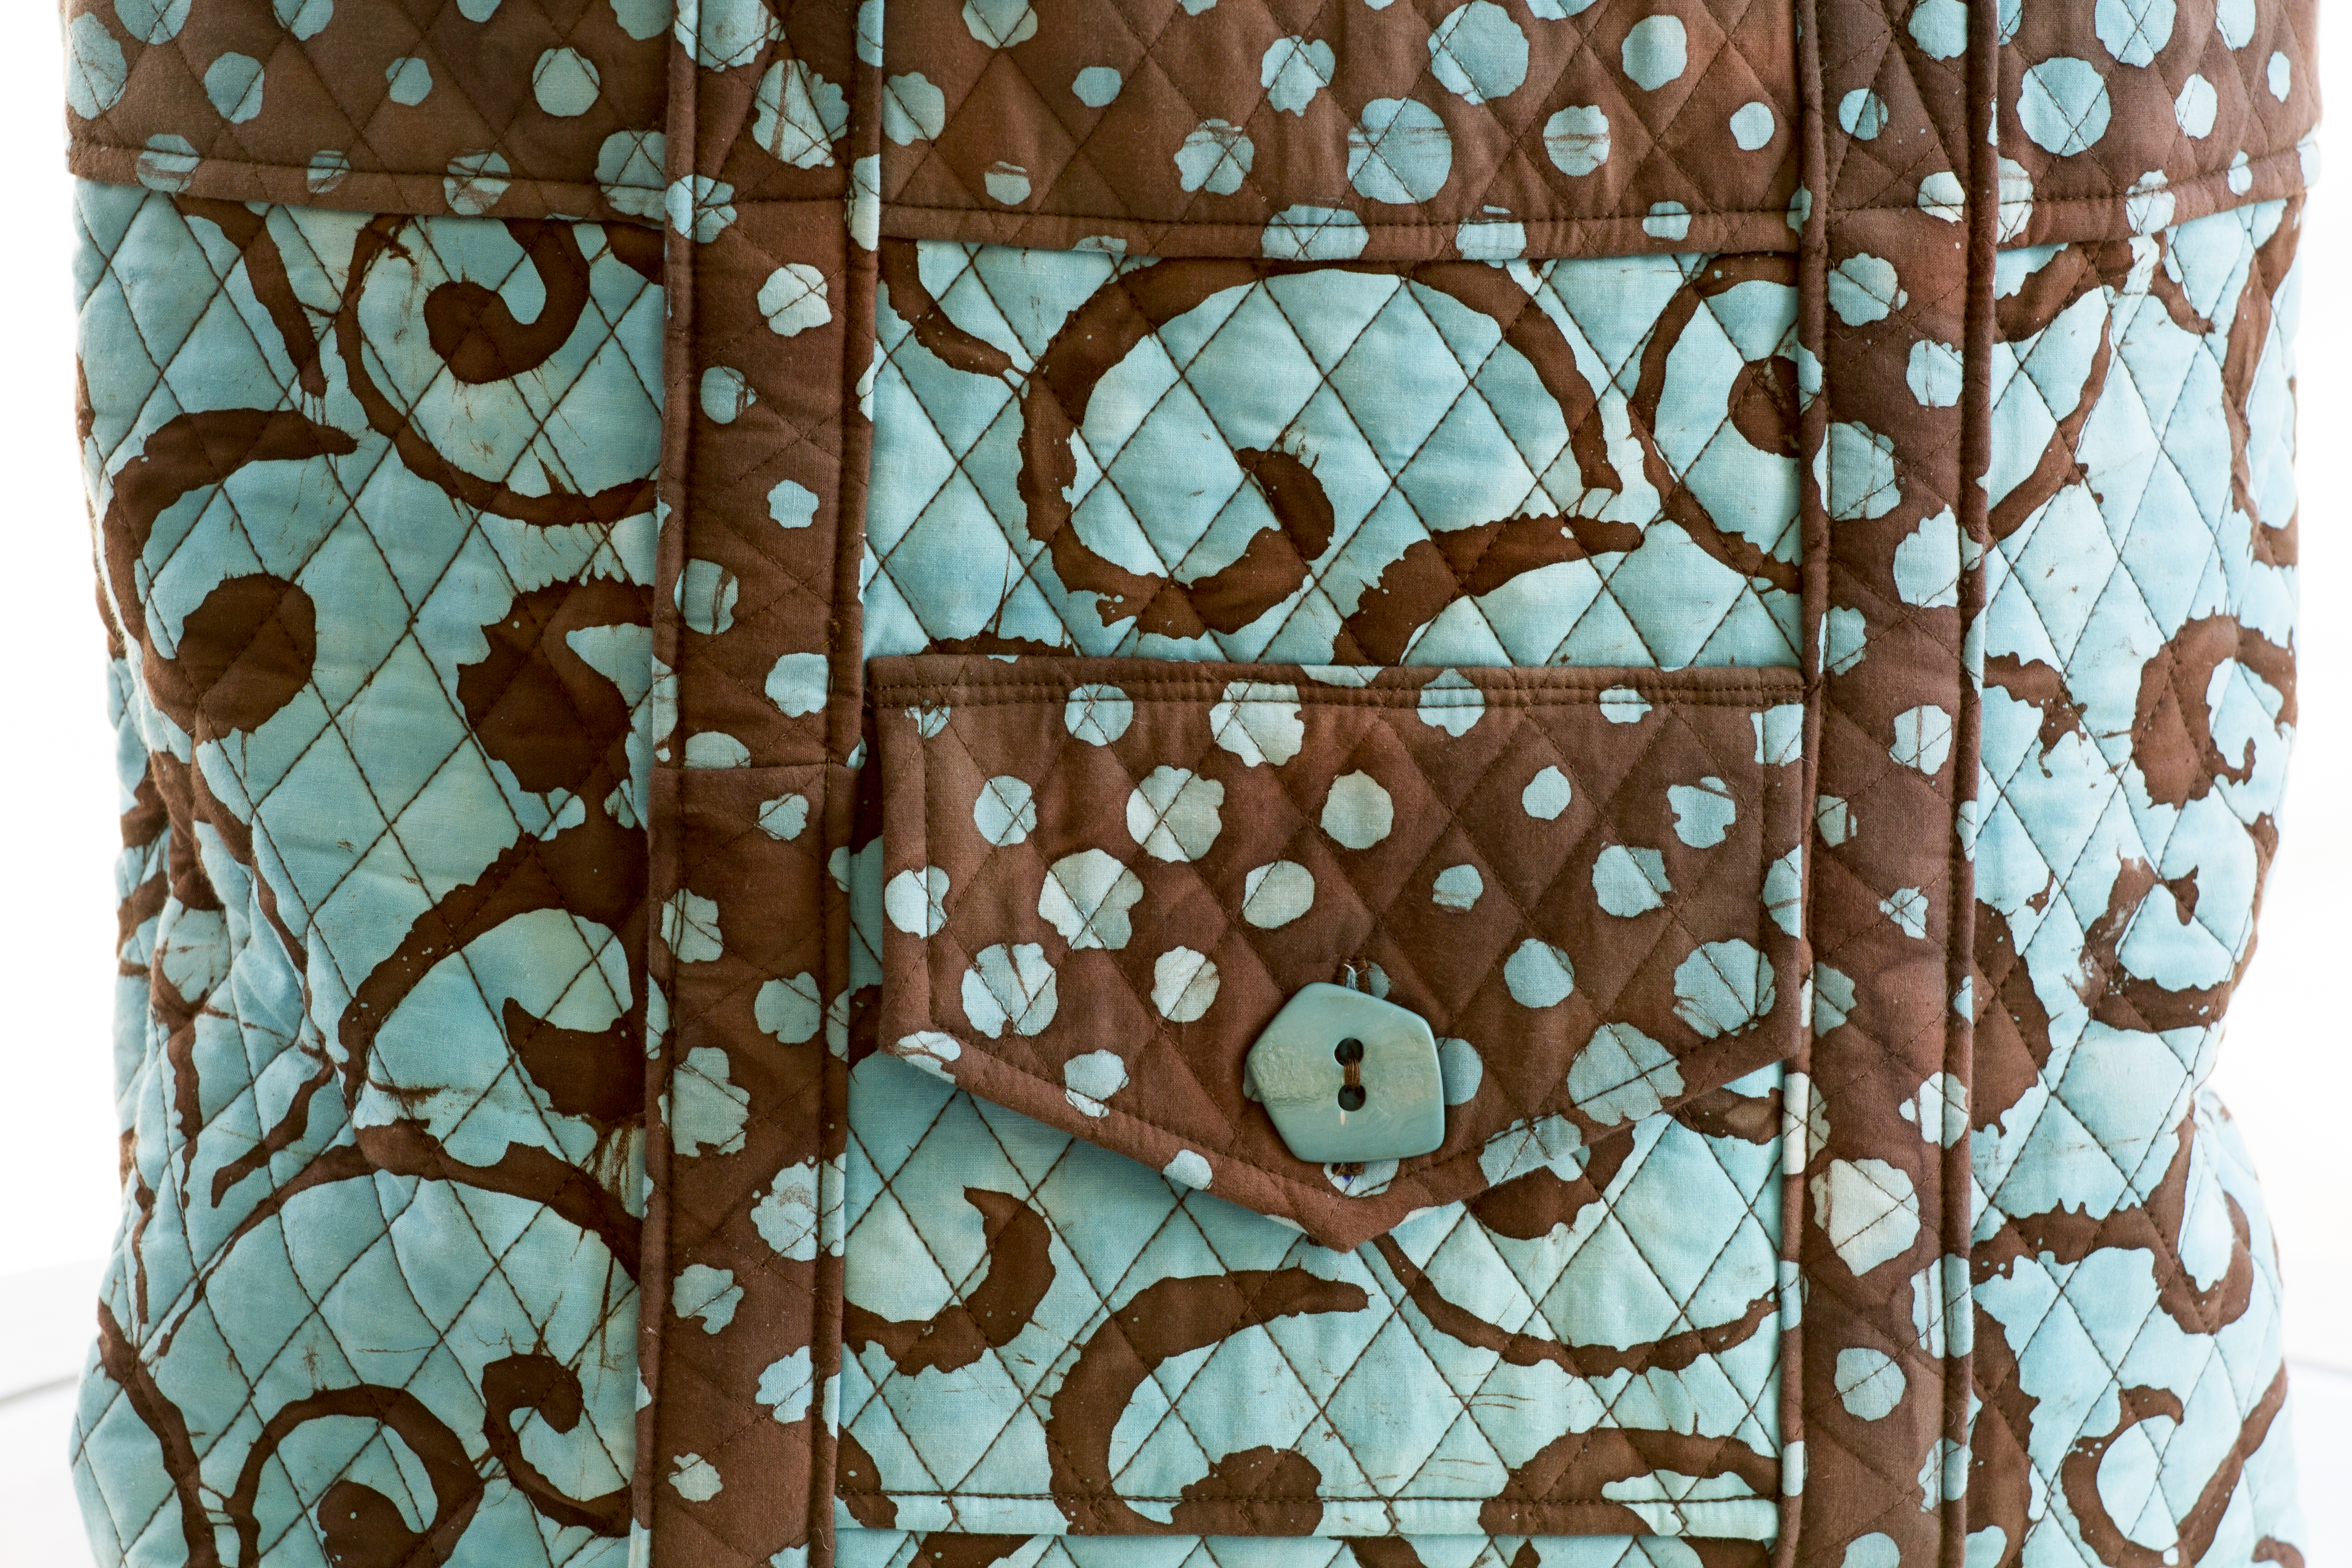
Pocket Detail http://www.lifeatthecottage.com
Take pocket and turn under 1/2 inch on 7 inch side, iron, and top-stitch(this will be the top of the pocket). On the opposite side turn under 1/2 inch and iron. Pin pocket in place and top-stitch the bottom edge only leaving pins in sides.
Put right side together of the 20 x 20 with the turned under edges at the top. Sew the bottom seam only.
Make straps or get purchased straps. Sew ends together to make a large continuous band. Divide strap into two equal parts and put a pin to mark the two equal points. Pin the two points on the bottom seam and pin strap up equally (cover the raw side edge of the pocket with straps) to the top of bag. Top-stitch the straps in place stitching so the raw side edges of the pocket are sewn under the straps. Sew an X on the strap at the top edge to give more strength to the bag.
Turn under 1/2 inch on the two point sides of flap and iron. Lay flap on pocket to fit and turn under side edges enough to fit between straps. Iron and top-stitch the turned under edges. Make a button-hole in the flap for your button and turn under 1/2 inch at the top of flap and iron. Pin in place above pocket and top-stitch two rows of stitching making sure not to catch the top of the pocket.
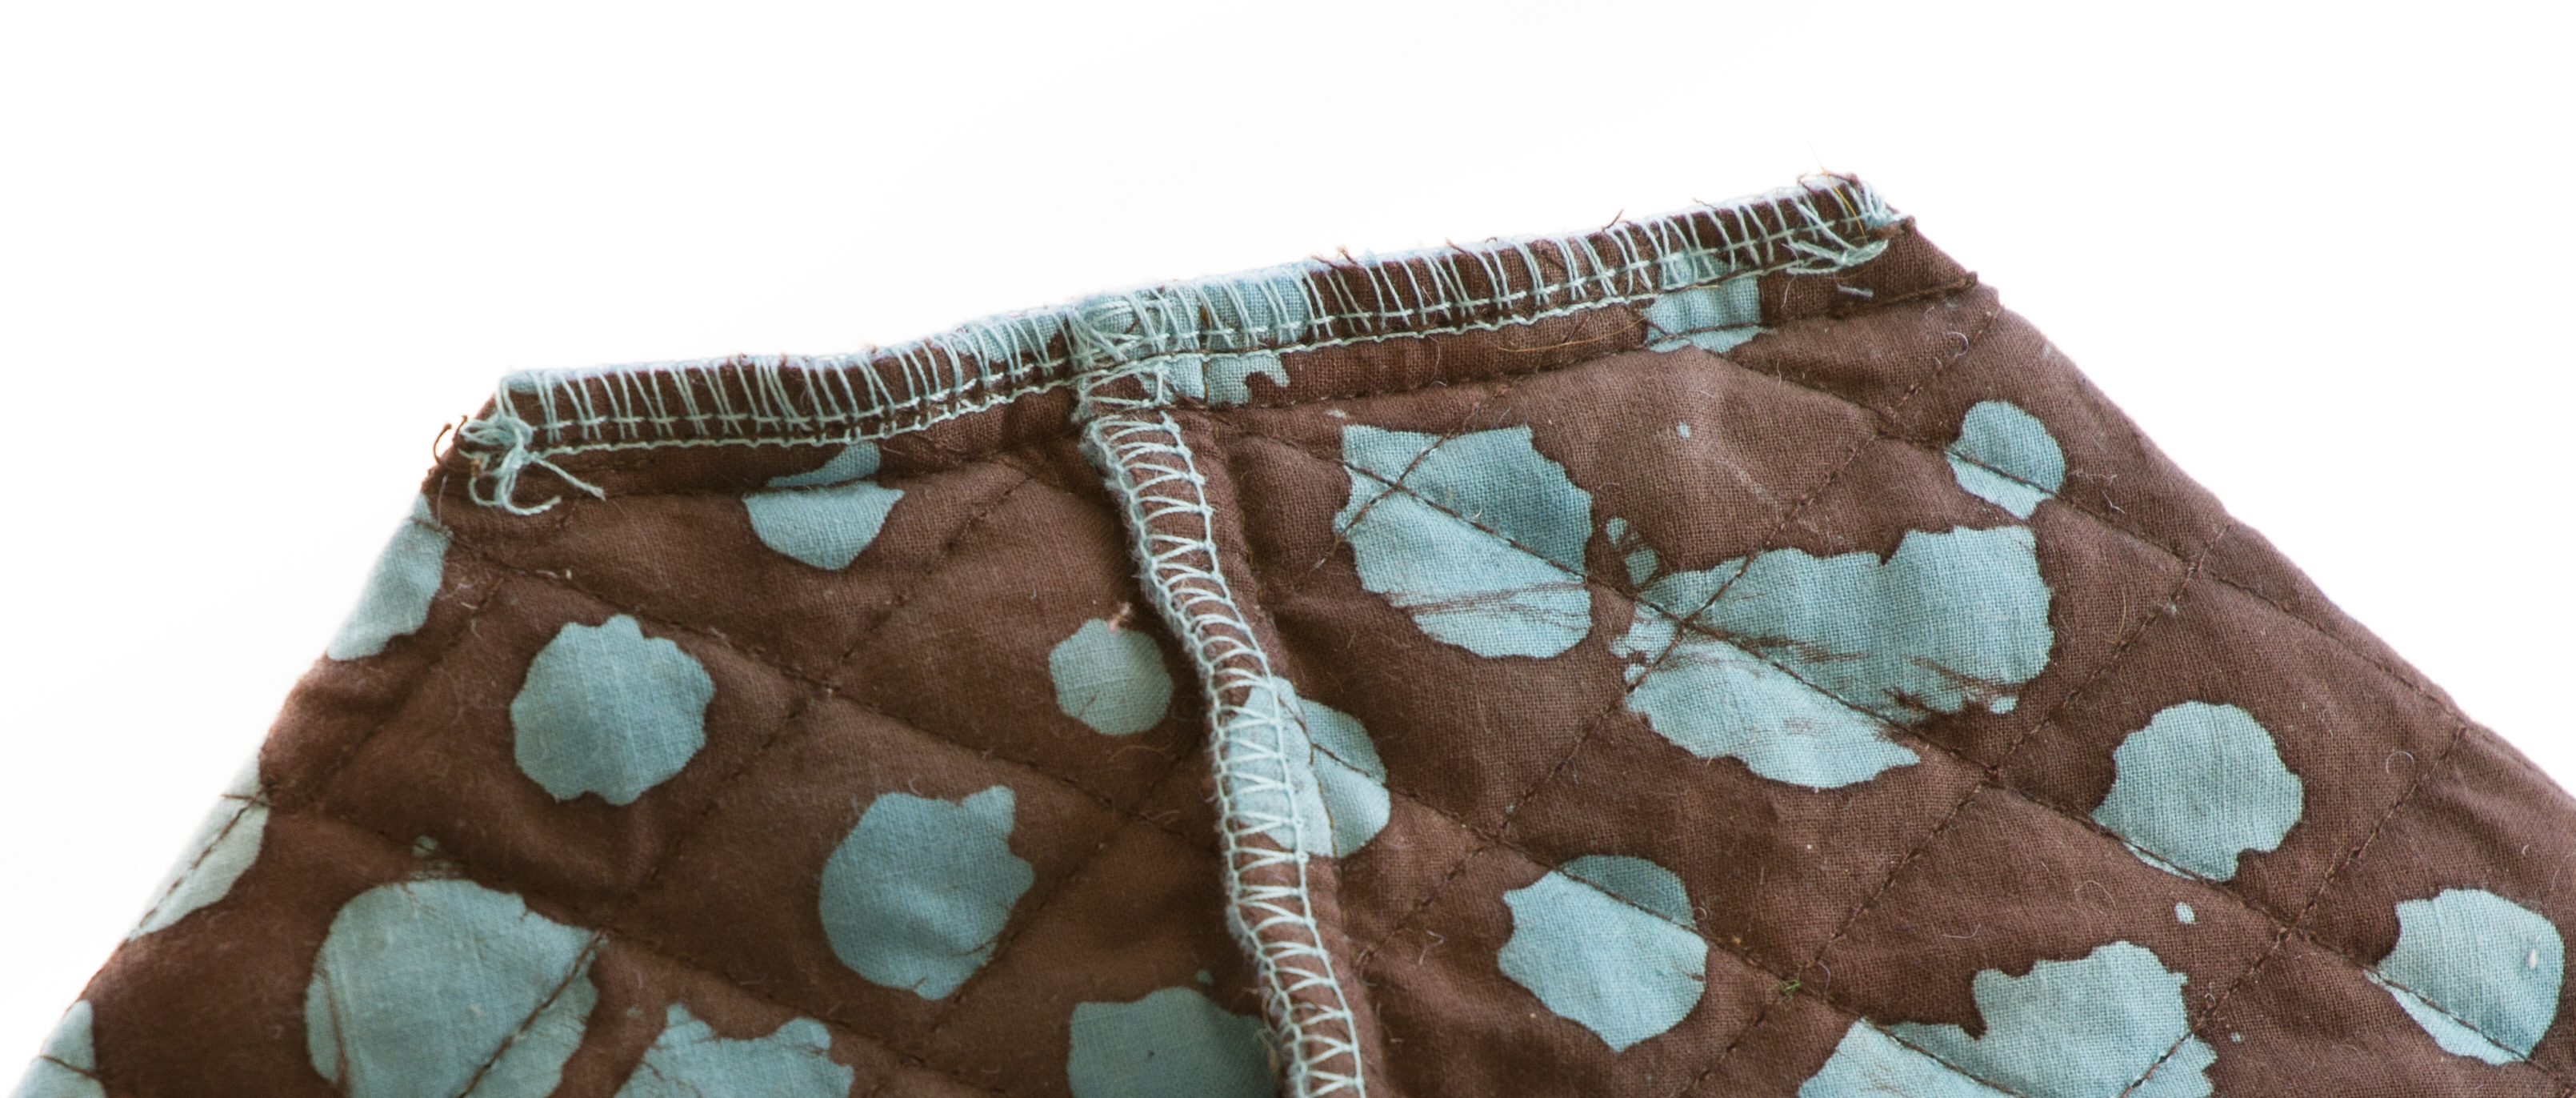
Inside Box Corner http://www.lifeatthecottage.com
Pin sides together matching top edges and stitch. On the inside pinch the corner to make a 4 inch box pleat and stitch. Cut off point. Lastly sew on button.
Have fun creating different looks for your tote bag. The totes are fun gifts especially if filled with a themed gift such as ingredients for an Italian dinner. Could be used as a slumber party bag with coordinating pajamas. See what creative ideas you can come up with for your bag.

The tote turned out beautifully. I would make another as it was fairly easy to do. Thanks
Thank you!